I have been looking forward to this fall, because fall is the time of year when grapes are ripe and ready to be harvested. The grapevine that I have growing on my outdoor pergola is an ‘Einset’, a red seedless table grape. This particular variety was recommended to me by the head arborist at the Home Orchard Society at Clackamas Community College, where they have an arboretum of fruit trees, but which also includes grapes and figs, and other types of fruit. I’ll show you the progression of this vine.
I started it from a free cutting that I got at the Home Orchard Society Rootstock Sale and Scion Exchange, which is held every March. I basically put the bottom end of the cutting in damp paper towel, put it in a ziplock bag, and put it in my refrigerator for about a month or so, untill roots started coming out of the bottom of the cutting. I then took it out of the frig, and potted it up in a container with potting soil. I let it grow a little bit more, so the roots could get more established, and then I planted it outside in position. Here’s what it looked like as a baby vine in 2008:
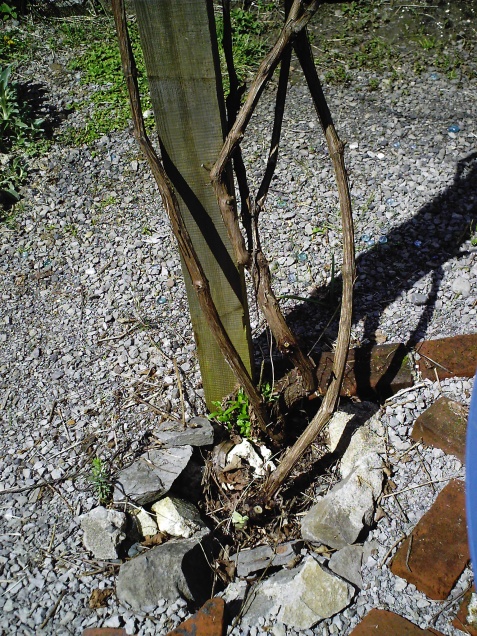
So we were off to a good start–the cutting was healthy and growing. This was the first grape I’ve ever grown, so I was a total neophyte in terms of pruning. So basically, I didn’t do any until this year. Here’s what I had to deal with early on:
As you can see, there is one plant crown, but four trunks growing out of it. This caused the grape vine to produce a ton of leaves and no fruit. I knew I had to learn how to prune it to get it to produce fruit. The first thing I learned was that there is only supposed to be one trunk coming out of the crown. But I had grown this vine from a tender baby, and I didn’t want to kill it, so I cut it down to two trunks. (I know, I am a pruning wuss.) I figured if something went wrong, I’d still have one trunk left to play with.
I learned a little bit. First off, each grape variety produces the most fruit if you prune them in one of two methods: spur pruning and cane pruning. Each variety of grape has one or the other of these pruning requirements. I looked up ‘Einset’ and discovered that it responds best to cane pruning. You are supposed to do grape pruning, at least here in SW Washington State, around the end of February, when the vine starts putting out the first new growth in the form of leaf buds. I didn’t get around to pruning it until the beginning of May, which is quite late, so I made a note on my gardening calendar to do this earlier next year. (If you recall last February, the weather was very cold and rainy, but if you’re growing fruit, you just have to gird your loins and get out there to prune.)
I don’t have good pictures of how to do cane pruning–I was doing well to get out there and prune it at all this time around. My hope is that next year I can take some and do a more detailed post on how to do it. But basically, each trunk produces two cordon arms (You have to train it, ie. prune it, to get it to do this), and from this arm you want to have at least sixteen canes coming out from each of the cordon arms, because this is where the grapes are produced. You also want to keep a spur, a short cane, near the base of the cordon arm, with the idea being that the spur will grow long over the growing season, and next year you replace the cane that produced fruit the year before with the fresh cane that grew from the spur of the previous year, to constantly rejuvenate the plant each year so it produces well. I positioned the cordon arms and the canes so they were spread out over the entire pergola roof, and tied them into place on the wooden beams of the roof.
I had a HUGE pile of vines when I finished pruning–no photo, but I cut that entire gigantic overgrown plant back by half. It looked pretty puny after that. But I had faith–this is a grape, after all, and they grow like crazy each year, so I figured I couldn’t damage it too much even if I didn’t prune it exactly right. (I later learned from a friend who has produced wine from his own wine grapes that you can take a chain saw and cut a grapevine down to the ground, but you won’t kill it, because it will send out new vines from the roots. In fact, it is pretty difficult to get rid of a grapevine because of this. This is one way to rejuvenate a badly overgrown grapevine–just cut it completely down and start over with it so you can train it properly from the beginning.)
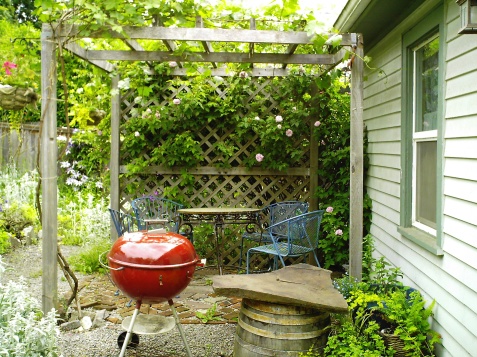
So the growing season began. Here it is in June of this year:
So here it is cut back to two trunks, and I “limbed’ it up so there was no leaf growth until the stem got to the very top of the pergola roof. Notice that there is a lot of open air showing through the roof at this time–not much leaf cover yet.
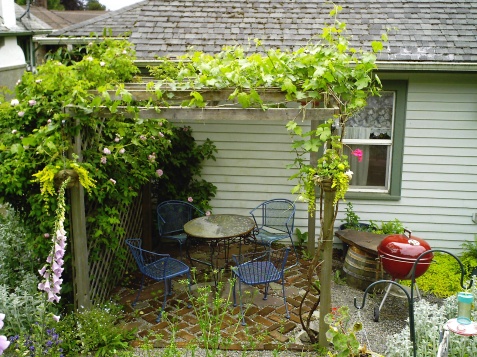
But don’t feel sorry for that vine at all–here’s what it developed into by July 2011:
Notice that there’s not much open space at all now–it is completely covered in leaves . . . and also, finally, baby grape clusters!
Having it growing on the pergola made it very easy to pick the grapes later, so I liked that. And I love how they look–they are small, green and tart at this stage, but the clusters are even pretty for decorating a buffet table if you’re having a party. Now technically, you are supposed to thin the grapes, either remove entire clusters, or remove some of the grapes–the tips—from each cluster, but I wasn’t sure how much the vine would produce, if at all, so I didn’t thin this year. And frankly, it didn’t seem to hurt anything. Also I’ve been told if you thin, it produces sweeter grapes, which could be true because the vine is putting its energy into less fruit, but I just decided to leave well enough alone this time around. If you have a young vine that is only just starting to produce, the advice is to thin the fruit so it doesn’t wear itself out with a huge crop early on in its life, and then let it gradually produce more and more each following year, so the framework of the vine can support the growth of all the fruit.
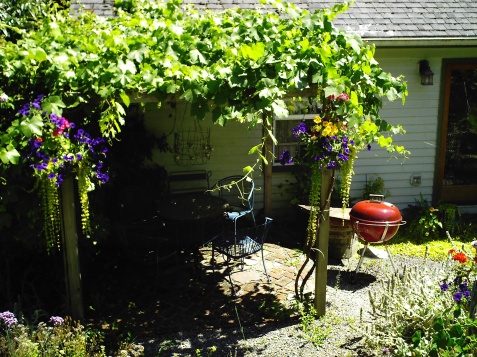
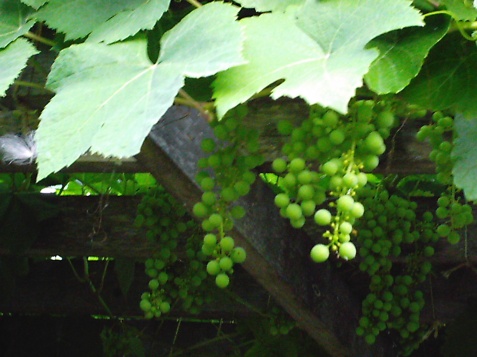
Here they are in August:
The grapes are still green, but filling out and getting bigger.
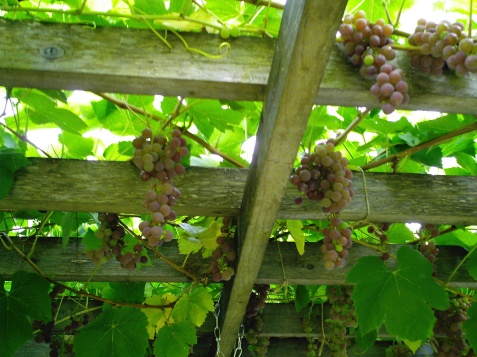
Finally, on September 5th, here is what they looked like:
So, we were in business–eating fresh and delicious ‘Einset’ table grapes by Labor Day Weekend! I still don’t have a completely developed cane framework yet with this vine, but nevertheless it produced a lot of fruit for us for about two and a half weeks. There were a few final grape clusters that I was giving one more day to ripen, and something (birds probably, or a raccoon?) came out and overnight had a big grape-eating party. I came out the next day, and there were grape leaves everywhere, and fallen fruit, and empty stems on the grape clusters! So that was the end of that!
I also had people warn me about growing grapes under a pergola where we had a dining table. They said the bees would become a problem, but I had no trouble with bees at all. Perhaps because I kept the grapes picked often, so they didn’t fall to the ground and attract insects. I also have a ton of flowers nearby, and maybe they were so busy with the flowers they didn’t bother with the grapes. It does produces a dense leaf cover that makes it kind of dark when you are seated there, but that’s why you add a candle chandelier!
For more information of growing and pruning grapes, I recommend Ron Lombaugh’s book called The Grape Grower. Ron grows grapes locally in the Willamette Valley of Oregon.
So that’s it for my grape-growing adventures for this year! What gardening adventures have you had this season–do tell in the comments! And visit the garden party.



allysgrandma said,
September 19, 2011 at 8:35 pm
Wow, wow wow! You were so patient. And it was so worth waiting for. Really beautifu! Now I hope they taste good!
minervasgardenwriter said,
September 19, 2011 at 9:56 pm
They taste wonderful–just so sweet!
Fishtail Cottage said,
September 20, 2011 at 6:19 pm
the grapes are gorgeous hanging down that way! beautiful! xoxo
minervasgardenwriter said,
September 20, 2011 at 11:45 pm
Thank you–I liked the way they looked as well!
Melinda said,
September 20, 2011 at 7:53 pm
I wonder if that potting technique would work with other grapes? I’m anxious to try it! We have some grapes but no nothing about pruning them. It looks like we have a lot of work to do! Thanks for all the helpful information!
minervasgardenwriter said,
September 20, 2011 at 11:33 pm
I think you could take any variety of grape cutting, chill it in the refrigerator and then pot it up to grow a bit more before planting it out; I don’t think the variety of grape matters at all. You do have to take the cutting at the proper time of year and handle it properly or it won’t work. You should be able to learn how to do this from a plant propagation book, or maybe the Sunset garden guide. Probably the first step to pruning is to look up each variety of grape that you have, and then determine if they like to be cane or spur pruned, and then take it from there next late-winter or early-spring. And I guess what I learned is don’t be afraid to prune it–if something isn’t exactly right, the vine will grow back in most cases!
Lexa said,
September 21, 2011 at 4:47 am
Wow! That was a great post. I don’t know a thing about growing grapes. You are turning into an expert – good for you! All of your hard work and patience is paying off with a super healthy plant and lots of grapes to enjoy.Thanks so much for sharing.
minervasgardenwriter said,
September 21, 2011 at 8:11 am
Thank you for your kind words. I have a long way to go in learning about grapes–the pruning part seemed pretty complicated, but once I got in there and gave it a try, it wasn’t so bad!